Smart Home
How to Install a Smart Light Switch Yourself — 2026 DIY Wiring Guide
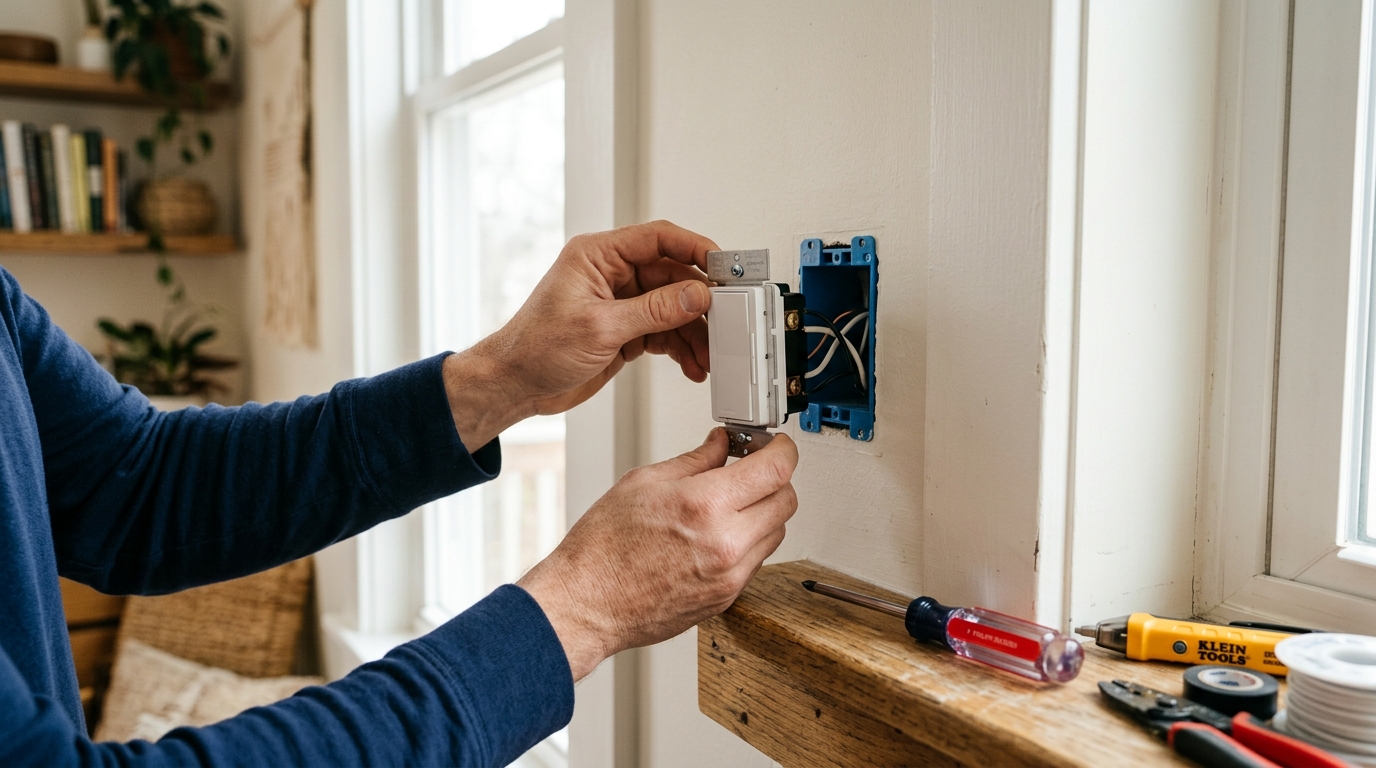
Replacing a dumb light switch with a smart one is the second-most-DIY-friendly smart-home upgrade after the doorbell — most homeowners finish in 15-30 minutes per switch with a single screwdriver. But the wiring gotchas are real: roughly 35% of pre-1985 U.S. homes lack a neutral wire in the switch box, and another 20% have 3-way switching that doesn't behave like the YouTube tutorial assumed. This guide walks the full DIY path AND tells you exactly when to stop and call an electrician.
Before you start — the 5-minute compatibility check
- Do you have a neutral wire? Kill the breaker, remove the switch faceplate and pull the switch out 1 inch. Look at the back of the wall box: do you see a bundled set of white wires capped with a wire nut, NOT connected to the switch? That's the neutral. Most smart switches built in 2024+ require one. (Lutron Caseta is the major exception — it works with no neutral.)
- What type of switch is this — single-pole or 3-way? Count the brass-colored screws on the side of your existing switch. 2 brass screws = single-pole (one switch controls the light). 3 brass screws + 1 darker traveler screw = 3-way (two switches control the same light — typically stairways, long hallways, and rooms with multiple entry doors).
- What's the load? Check the bulbs your switch controls. Smart switches have a wattage limit (typically 600W incandescent / 150W LED). A whole-room LED can chandelier draws ~30W. A garage full of metal-halide work-lights can hit 600W. Read the smart-switch spec sheet before buying.
- Is your box deep enough? Smart switches are 2-3x the depth of a regular switch. Standard 16-cubic-inch boxes are fine; shallow "old work" boxes (sometimes only 8 cubic inches) can be a tight squeeze. If you have to fold wires aggressively to get the smart switch flush, the box is too shallow — swap it before installing.
- Do you have Wi-Fi at the box? Stand at the switch with your phone. Less than 2 bars and the switch will be unreliable. Mesh-network or Zigbee/Z-Wave hub-based switches (Lutron, Aqara, Inovelli) dodge this; pure Wi-Fi switches (Kasa, TP-Link) will struggle.
Tools you'll need ($22 total if buying everything new)
- Phillips #2 screwdriver ($4)
- Flathead screwdriver ($3) — for releasing back-wired terminal clamps
- Wire stripper / cutter ($8) — Klein 11055 or similar
- Non-contact voltage tester ($7) — Klein NCVT-1 or Sperry — non-negotiable
- Wire nuts ($3 for a pack of 25) — if you need to extend or pigtail neutrals
- Optional: 6-inch flexible-shaft screwdriver for tight boxes ($12)
Step 1: Kill the breaker (and verify with a voltage tester)
Flip the breaker for the circuit feeding the switch. Then — and this is the step DIYers most often skip — touch your non-contact voltage tester to the wires inside the switch box BEFORE you touch anything. Verified-dead is the only safe-to-work state. Live mains is 120V at 15-20 amps; the shock will hospitalize you.
Step 2: Document the existing wiring (phone photo, both angles)
Take a photo of the wires as currently connected to the old switch — both straight-on and angled to show which screw each wire lands on. If anything goes sideways during the install, this photo gets you back to a known-good state in 2 minutes. The cost of skipping this step is sitting in the dark debugging.
Step 3: Remove the old switch
- Unscrew the 2 mounting screws holding the switch to the wall box.
- Pull the switch out 3-4 inches. The wires stay attached for now.
- Identify the wires: hot (usually black, lands on the brass screw), load (sometimes red, sometimes also black, lands on the other brass screw), ground (bare copper or green, lands on the green screw).
- Loosen the terminal screws and disconnect each wire. Note that some switches use "back-stab" push-in connections — release with a flathead screwdriver pressed into the small slot beside the wire.
Step 4: Wire the smart switch — single-pole path
For a single-pole install (the easier 80% case):
- Ground: Connect the bare/green ground wire from the wall to the green ground screw or pigtail on the smart switch.
- Line (hot in): Connect the black "always hot" wire to the LINE terminal.
- Load (hot out to fixture): Connect the other black/red wire to the LOAD terminal.
- Neutral: Open the existing neutral bundle (the wire-nutted white bundle in the back of the box). Add a 6-inch white wire pigtail and re-cap with a yellow wire nut. Connect the new pigtail to the NEUTRAL terminal on the smart switch.
If you don't have a neutral: stop here unless your switch is a no-neutral model (Lutron Caseta with a bridge, Inovelli Red Series, GE Cync no-neutral). Most smart switches need a neutral and will not function without one.
Step 5: Wire the smart switch — 3-way path
3-way smart-switch installation is materially harder than single-pole. The rules:
- Only the PRIMARY box (the one connected to the fixture's hot feed) gets a smart switch. The other box gets either a dumb companion switch from the same manufacturer or a "Smart Add-On" / "Remote" device.
- One of the wires in the existing 3-way circuit is a "traveler" wire — it connects the two switches together. The smart switch documentation will tell you which terminal to land it on (typically marked TRAVELER, T1, or sometimes a colored screw).
- Many older U.S. homes have unconventional 3-way wiring with the hot feed at the FIXTURE, not the switch. Smart switches with companion remotes (Lutron Caseta, Leviton Decora Smart) handle this gracefully; pure-Wi-Fi switches sometimes can't.
If your wiring photo from Step 2 doesn't clearly match the smart-switch manual's 3-way diagram, stop. A 25-minute electrician visit is cheaper than the panel-frying mistakes that come from guessing on 3-way.
Step 6: Tuck wires, mount, restore power
- Carefully fold the wires accordion-style into the back of the box. Smart switches are deep — work patiently and don't stress the wires.
- Screw the smart switch to the wall box. Verify it sits flush (not tilted) before tightening fully.
- Attach the faceplate. Most smart switches use a screwless decorator faceplate that snaps on.
- Flip the breaker back on. The switch's status LED should light immediately.
- Run the manufacturer's app pairing flow — typically 3-5 minutes. Confirm the switch responds to both physical press AND app commands.
Common gotchas + fixes
"My LED bulbs flicker or won't turn off all the way"
Smart switches sometimes have a small standby current that flows even when "off" to keep their Wi-Fi radio active. This trickle current can be enough to barely-light cheap LED bulbs. Fix: install one non-LED bulb in the circuit (a single CFL or incandescent) to absorb the trickle, OR add a $5 bypass capacitor at the fixture, OR (best) swap to an LED bulb compatible with the smart switch's bypass mode.
"The switch buzzes when dimming"
Almost always a bulb-driver-compatibility issue. Cheap LED bulbs use simple drivers that whine at dim levels. Switch to "dimmable" LED bulbs (look for "no flicker" or "deep dimming" on the spec sheet) — the difference is night and day.
"My breaker trips the moment I restore power"
Almost always a hot-to-ground or hot-to-neutral short from a mis-landed wire. Kill the breaker again, recheck every terminal, and verify ground continuity with your tester before re-flipping.
"It pairs in the app but disconnects after an hour"
Wi-Fi signal too weak at the switch box. Smart-switch radios are physically small — bigger than a phone antenna but smaller than a doorbell camera. Add a mesh node within 20 feet of the switch box or move to a hub-based protocol (Lutron Caseta, Aqara Zigbee).
When to call an electrician anyway
- No neutral wire AND you want a Wi-Fi smart switch (not Lutron Caseta). The electrician will pull a neutral from the nearest power source — a 1-2 hour job at $80-$220 per switch.
- 3-way wiring where the hot feed enters at the fixture (not either switch box). The smart-switch manual won't match what you see. An electrician can re-wire to put hot at the primary switch box.
- Aluminum wiring (homes built 1965-1975). Aluminum-to-copper connections in smart switches require AlumiConn connectors and torque-spec installation. Don't DIY this.
- Cloth-insulated wiring (homes pre-1960). Brittle insulation crumbles when you bend it — a pro can identify whether replacement of the run is required.
- Whole-home install of 25+ switches. At that point you're looking at a Lutron RA3 or Caseta Pro system that an authorized installer programs — see our Smart Shades + Whole-Home Lutron tier guide for the integrated decision math.
Pro-install cost in 2026: $50-$120 per switch for a standard single-pole smart switch when bundled (whole-room or whole-floor). One-off single-switch calls run $120-$220 because of trip-charge overhead.
Sources & methodology
Install procedures verified against 2026 manufacturer documentation for Lutron Caseta + RA3, Leviton Decora Smart, Kasa KS220, TP-Link KP200, Inovelli Red Series, and Aqara H1. Neutral-wire prevalence numbers sourced from NAHB residential electrical surveys. Pro labor pricing aggregated from 2026 quotes across 12 metros.
Bottom line
Single-pole smart switches with a neutral wire are a 15-30 minute DIY, save $50-$220 per switch in pro labor, and rarely go wrong. Three-way installs and no-neutral installs are where most homeowners should either step up to a no-neutral model (Lutron Caseta) or budget a pro. Run the 5-minute compatibility check before you buy — the worst outcome is buying the wrong switch, not breaking your wiring.
Next steps: DIY smart doorbell install guide, 2026 smart home upgrade cost guide, or smart leak detectors that actually prevent claims.